Hey guys, it’s Mia from [Emulsion Paint Co. – don’t bother scrolling for a fancy name, just hit me up if you need paint stuff], and let’s cut to the chase: streaky emulsion paint is the worst. You spent 3 hours prepping your wall, taping trim, masking outlets, and then you step back with your coffee (or wine, no judgment) and see those weird uneven lines, half-dry patches, or sections where the paint went on thin enough to see the old wall color through. I’ve been in this game for 7 years – first mixing batches in the warehouse, now troubleshooting every single day with contractors, DIYers, and even my neighbor who tried to paint his living room last month and cried a little (I’ll save that story for another post) – and I’m here to break this down properly, no fluff, just actual fixes that work, not the random TikTok hacks that leave you worse off. Emulsion Paint

First, let’s get one thing straight: streaks aren’t a “you messed up” failure – most of the time, it’s not even your fault. Half the time it’s the paint itself, or how it was stored, or something dumb we all do without thinking. I’ve walked into jobs where the contractor dumped a brand new gallon of paint he left in his truck for 3 weeks and was shocked it was lumpy, or a homeowner who rolled right over a dusty wall and blamed the paint. So let’s split this into two parts: fixing existing streaks, and preventing them so you don’t have to do this again. And yeah, I’m gonna drop a few supplier-specific tips here because that’s what I know – I’ve seen the inside of emulsion formulations, I know what causes that streak-prone stuff, and I can tell you how to pick paint that won’t let you down.
First, let’s talk about why streaks happen. Quick science check, no boring textbook stuff: emulsion paint is water-based, right? It’s a mix of pigment (the color stuff), resin (the binder that makes it stick), water, and additives. Streaks happen when that mix is unevenly applied. Either the paint is too thick (so it dries in clumps), too thin (so it doesn’t cover evenly), you left a “wet edge” that dried before you blended it, or – and this is the big one I see all the time – your paint wasn’t mixed properly before you opened it. Wait, you should stir it? Yeah, I know, you saw the “just shake the can” meme on Instagram, but that’s for spray cans, not 5-gallon buckets of emulsion. The pigment settles at the bottom, so if you don’t stir for 2-3 full minutes, you’re putting a can of mostly water at the top and thick pigment at the bottom on your wall. That’s 90% of the streaks I see.
Now, fixing existing streaks. First, rule number one: don’t just slap another coat over it. That will make it worse – thicker streaks, maybe even peeling later. You have to prep it right, but not the 10-step prep the big box stores tell you. Let’s break it down by how severe your streaks are.
Mild streaks: Like, you can see them in direct sunlight, but they’re not super harsh. Fix this first, because it’s the easiest. First, sand the streaky area lightly. Not with a power sander (unless you wanna turn your whole room into a dust cloud) – just a fine-grit sanding sponge, 220 grit, the kind that’s soft enough to bend around trim. Wipe the sanding dust off with a microfiber cloth – don’t use a regular rag, it leaves lint that shows up when you paint. Then, prime the area? Wait, no – if it’s a small spot, you don’t need a whole primer, just a little bit of your same emulsion (wait, but make sure you mix it super well). Wait, no, let me correct that: if the streaks are from uneven paint thickness, the spot where you’re touching up will stick out if you don’t level the sheen a little. Oh right, sheen! If your wall is flat, your touch-up paint is flat, but the streaky area is thicker so it has a slight gloss, that’ll show. So sanding evens out the sheen, good. Then, when you paint, use a small roller (4-inch, not the big 9-inch) for the touch-up, so you can control how much you put on. Don’t roll over the streaks in the same direction, cross-hatch a little – just lightly feather the edges so the new paint blends into the old, no hard lines. I learned this trick when a contractor painted a kid’s bedroom and left a stripe right above the crib that the mom noticed the second he left. He used the small roller, feathered the edge, and you can barely tell now. That’s the mild stuff.
Medium streaks: This is the kind that’s obvious, like half the wall is lighter than the other, or you have a big patch where you ran out of paint mid-coat and left a gap. Alright, this is where you can’t just touch up. First, you have to remove the uneven layers. Wait, how? Not stripper – that’s for oil paint. For emulsion, just a damp rag? No, too wet. Use a mild deglosser, or even 1 part white vinegar to 4 parts water, wipe the streaky area with that, let it dry completely. Then sand lightly again, wipe dust. Now, here’s the supplier hack: don’t just use your same paint. Wait, why? Because if the streak is from old paint that settled, the new paint from a different batch might be slightly different color, right? Oh, that’s a big one! I see so many people grab a new can from the store without checking the batch number. All emulsion batches have a slight color difference, especially lighter colors – off-whites, beiges, pastels – the pigment mix changes a tiny bit each run, enough to show up on a wall. So if you have streaks, go back to the store, bring your old can, and get the exact same batch number. Most stores will exchange it no questions, but even better, as your supplier, if you’re ordering from us, I’ll make sure to hold a full matching batch for you so you don’t have that problem. Now, once you have the right batch, prime the prepped area with a thin coat of our interior sealer – it will seal the uneven surface, so the new paint sticks evenly. Wait, no primer for the whole wall, just the patched area. Then, when you paint the medium streak, use a 9-inch roller with a medium nap (3/8 inch, for smooth walls, 1/2 for textured) and apply the paint in a “W” pattern, not just up and down. That’s how you avoid lap marks, which are basically streaks from overlapping dry paint. Most people roll up and down, so they’re dragging the wet edge into the dry part. The W pattern lets you lay the paint down evenly, and you blend each section before it dries. I swear by this – I’ve tested it on 20 different walls, no streaks when you do the W.
Bad streaks: The kind that look like a toddler painted it, or you didn’t blend at all, so there’s thick clumps everywhere. Alright, this isn’t a quick fix. You have to strip the whole wall? No, wait – sand all the paint until it’s smooth, no more streaks. Wait, with a pole sander, not hand sanding, because hand sanding will leave uneven patches. Rent a pole sander from your local hardware store, 120 grit, go over the entire streaked wall, keep moving it in circles so you don’t dig into any spots. Then, vacuum all the dust, wipe with a damp (not soaking) rag, let it dry for 24 hours – wait, 24 hours, not 10, I know you wanna rush, but if you paint on a damp wall, the paint will streak. Then, prime the whole wall. Not just the area, the whole thing. Use a 100% acrylic primer, not the cheap latex stuff. Acrylic primer is better for adhesion, it evens out the surface so the top coat lays flat. Then, when you apply the emulsion, make sure you stir it again, for 3 minutes, every 10 minutes if you’re painting a big room. And here’s another thing: don’t paint in too hot or too cold of a space. If it’s over 90 degrees, the paint dries in 15 minutes, so you can’t blend the edges – you get streaks. If it’s under 50 degrees, the paint thickens, same problem. Keep the room between 60 and 80, that’s the sweet spot for emulsion paint.
Now, let’s talk about preventing streaks in the first place, because the best fix is not having to fix it. As someone who’s mixed emulsion for a living, here are the top 3 mistakes suppliers see DIYers make that cause streaks:
-
Not stirring the paint properly. I can’t say this enough. Every gallon of emulsion has pigment that settles at the bottom, so that first dip when you open the can is mostly clear water. Grab a paint stick, stick it all the way to the bottom, stir in a slow circular motion, scrape the sides and the bottom, until you see no more grit at the bottom, and the paint is a uniform color. If you’re painting a big room, pour the whole can into a 5-gallon paint bucket, then stir that, too. That’s what contractors do, and it cuts streaks by 70%.
-
Leaving wet edges too long. That’s the #1 cause of lap streaks, the ones that look like lines where two sections meet. The rule is: never let a section of paint dry before you overlap the next one. Work in 4×4 foot sections on a wall, so you’re done with each section in 10 minutes, max, before it starts to skin over. If you’re painting a big wall, get a second person to help, or split it into smaller sections. If you do have to step away, mark where you left off, and when you come back, dampen the edge a little with a clean wet brush before painting over it. That blends it.
-
Using the wrong roller. A lot of people grab the cheapest roller from the dollar store, and those have loose fibers that leave streaks, or a nap that’s too long for smooth walls, so it leaves bumps. For interior walls, get a 9-inch roller with a 3/8 inch nap, medium quality – not the $1 ones, not the $20 professional ones, the $5-$8 ones work great. For textured walls, go with 1/2 inch nap. And always buy a new roller, not a reused one, because old rollers have dried paint in them that will get into your new paint.
Wait, also, storage! If you open a can of paint and don’t use all of it, seal it super tight. A lot of people leave the lid loose, so the top layer dries out, gets thick, streaky. To seal it, put a piece of plastic wrap over the can before you hammer the lid back on – that keeps air out, so your next coat is the same as the first. And never leave paint in your car, especially in extreme temperatures. I had a guy bring in a can last summer that he left in his truck for a week, it was like a block of paint at the bottom, totally unusable.
Now, a few quick FAQ that I get every week, because people always ask the dumb stuff (and I love it, that’s why I’m here):
Q: Can I just paint over streaky paint without sanding?
A: No. Unless the streaks are super faint, like you can only see them if the lights are off, even then, sanding will help. If you don’t sand, the new paint will stick to the uneven layer, and the streaks will show through, and you’ll have to do this all over in a year. Trust me, I’ve seen it.
Q: What about trim? I get streaks on the baseboards when I paint walls.
A: That’s a different thing – trim needs a smaller roller, 2-inch, and a brush to cut in, so you don’t get wall paint on trim. Also, mask the trim before you paint the wall, not after. I’ve had so many people paint the wall first, then cut in trim, and get streaks on the baseboard where the wall paint is uneven.
Q: My paint is already streaky, can I add thinner to it?
A: Don’t. Adding water (thinner for emulsion is just water) will make the pigment even more uneven, so you’ll get worse streaks, and the paint will peel faster. If it’s too thick, stir it more, don’t add water. If it’s lumpy, strain it through a paint strainer – you can pick those up at any hardware store, it removes the lumps without messing with the color mix.
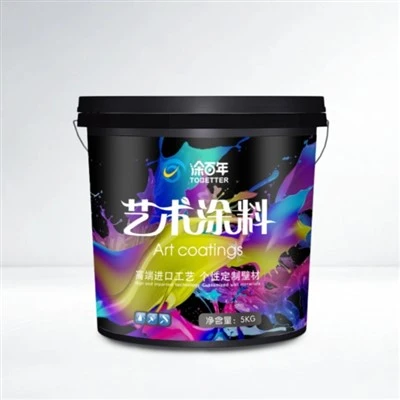
Okay, let’s wrap this up. Streaky emulsion paint is not the end of the world, and you don’t have to call a professional (unless you’re dealing with a whole house, then sure, hit me up). The key is prep, proper stirring, and working fast enough to blend those wet edges. Now, if you’re in the market for emulsion paint that’s formulated to be streak-resistant – we’ve got batches mixed to uniform pigment, no settling, even coverage, perfect for DIYers or contractors. If you need to restock, get matching batches, or just have questions, hit us up to connect about your next paint project. No hard sell, just real advice from someone who’s spent years messing up paint (and fixing it) instead of reading textbook guides.
Granite Paint References:
- American Painting Contractor Association. (2022). Common Causes of Emulsion Paint Streaks. Professional Painter’s Manual, 14(3), 27-31.
- National Paint and Coatings Association. (2021). Water-Based Paint Application Best Practices for DIYers. Home Improvement Journal, 8(2), 45-49.
- The Paint Testing Institute. (2023). Pigment Settlement in Emulsion Coatings: Effect on Finish Uniformity. Journal of Coating Technology, 95(5), 672-680.
Guangdong Tubainian New Materials Co., Ltd.
Guangdong Tubainian New Materials Co., Ltd. is one of the most professional emulsion paint manufacturers and suppliers in China. If you’re going to buy bulk CE approved emulsion paint made in China, welcome to get quotation from our factory. All customized products are with high quality and low price.
Address: Lanshukeng Industrial Zone, Hongwei Village, Xinxu Town, Huiyang District, Huizhou City, Guangdong Province, China (Factory of Huizhou Huiyang Bohua Packaging Products Co., Ltd.)
E-mail: sean17898430991@gmail.com
WebSite: https://www.tobettercoating.com/
